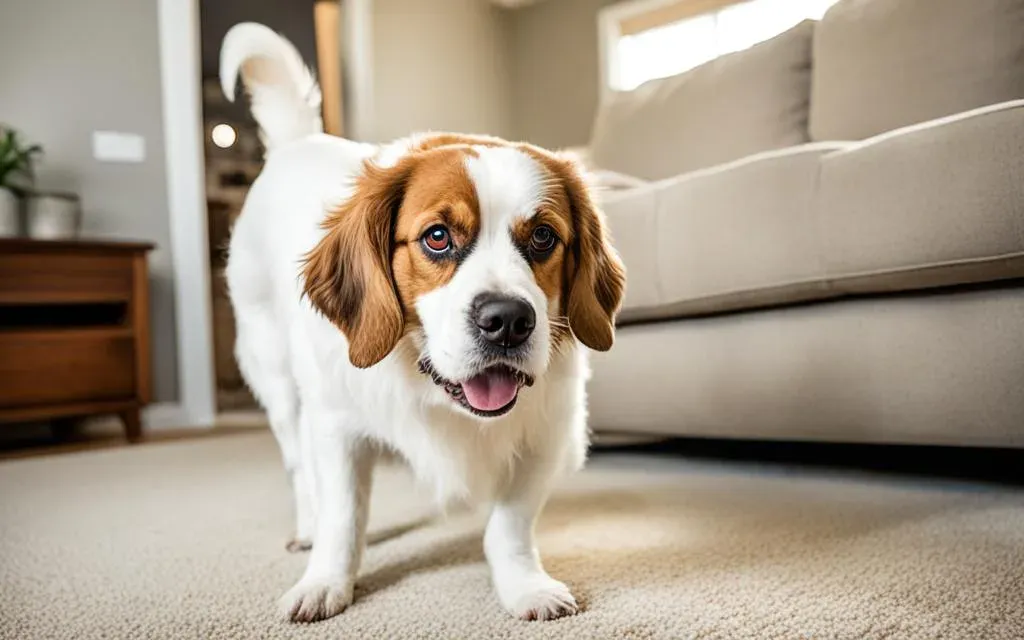
How to stop your cat from bullying your other cat? We share tips to address cat aggression, introduce cats properly, and create a peaceful multi-cat household.
How to Stop Cat From Scratching Couch
Stop your cat from scratching the couch with our expert tips on cat scratching deterrents, furniture protection, and scratch prevention training for felines.
How to Get Rid of Fleas on Cats Without Bathing
Get rid of fleas on cats without bathing using safe, effective treatments like topical flea medications, flea combs, vacuuming, and natural repellents.
Discover How to Keep Rabbits Cool in Summer – Top Tips
Naturepreservehub.com. Discover How to Keep Rabbits Cool in Summer – Explore our guide on ‘How to Keep Rabbits Cool in Summer.’ We provide comprehensive and practical advice to ensure your bunnies stay comfortable. Summer can be a challenging season for rabbits. As temperatures rise, they become more vulnerable to heat stress, which can lead to dehydration, heatstroke, and even death. Therefore, it is crucial to take proactive measures to ensure your furry friends stay cool and comfortable during the hot summer months. In this article, we will provide comprehensive advice on how to keep rabbits cool in summer. How to Keep Rabbits Cool in Summer Key Takeaways: Keeping rabbits cool in the summer is essential to their health and well-being. Providing adequate shade and proper ventilation are crucial for keeping rabbits cool and comfortable. Offering fresh and clean water is vital to keep rabbits hydrated during hot summer days. Regular monitoring of your rabbits’ behavior and health can help identify any signs of heat stress early on. Certain breeds of rabbits, such as Angoras and Lops, are more susceptible to heat stress and require extra care during the summer. Providing Adequate Shade During the summer months, it is essential to provide your rabbits with adequate shade to prevent them from overheating or suffering from heatstroke. Rabbits can easily become stressed and agitated when exposed to direct sunlight for extended periods, leading to dehydration, heat exhaustion, and even death. There are several ways to create shaded areas in your rabbit’s enclosure. One option is to place their hutch or pen under a tree or next to a building to take advantage of natural shade. However, if natural shade is not available, you can create artificial shade using different materials. Using Shade Cloth or Tarp Shade cloth or tarp is an affordable and effective way to provide shade for your rabbits. You can attach it to the top of their hutch or pen using clips or hooks, ensuring it provides full coverage. Shade cloth is available in different densities, allowing you to choose the level of shade required by your rabbits. Installing a Sunshade If you have a permanent rabbit enclosure, consider installing a sunshade. Sunshades are typically made from durable materials such as canvas or sailcloth and provide long-lasting shade for your rabbits. They are available in different shapes and sizes to fit various enclosures and can be customized as per your requirements. Using Natural Elements You can also create a shaded area using natural elements such as plants, trees, or bushes. Plants like bamboo, palm trees, and grapevines can provide excellent coverage and create an attractive backdrop for your rabbit’s enclosure. However, ensure that these elements are non-toxic and safe for your rabbits to avoid accidental poisoning. Pros of Shade Cloth or Tarp Cons of Shade Cloth or Tarp Easy to install and remove May not be durable in harsh weather conditions Affordable May not look aesthetically pleasing Customizable according to density and size May require frequent cleaning and maintenance Irrespective of the method you choose, ensure that the shaded area is adequately ventilated to allow proper airflow, preventing any buildup of heat. Don’t forget to check the shade provided periodically to ensure that it is still providing sufficient coverage and is not damaged or torn. We recommend ensuring your rabbits have access to shaded areas throughout the day, especially during the hottest parts of the day, to keep them cool and comfortable. Ensure the shaded area is large enough to accommodate all rabbits in your enclosure Install shade in the direction that provides the most shade during the times when your rabbits are most active Monitor the temperature regularly, and adjust the shading accordingly Provide multiple shaded areas if your rabbits spend most of their time outside the hutch With these tips, you can keep your rabbits cool and happy during the summer months, ensuring their health and wellbeing. In the next section, we will discuss the importance of proper ventilation in keeping rabbits cool. Proper Ventilation Proper ventilation is paramount to keep rabbits cool and comfortable during the hot summer months. When there is inadequate airflow in their living space, their body temperature can rise, leading to heat stress and other health issues. To ensure proper ventilation, it is essential to have a well-ventilated hutch or enclosure. You can achieve this by placing the hutch in a shaded area and using a wire mesh on the sides to improve airflow. If you live in an area with high temperatures, you can use a fan to circulate air and cool down the space. However, ensure that the fan is not directly blowing on the rabbits, as this can cause them to chill. Ventilation Requirements Type of Enclosure Air Changes per Hour Indoor Enclosure Four to six air changes per hour Outdoor Enclosure Six to ten air changes per hour We recommend checking the ventilation requirements for your specific type of enclosure to ensure adequate airflow. Another way to improve ventilation is to provide shade cloth on the top of the enclosure. The shade cloth can act as a barrier against the sun’s rays and create a cool and comfortable area for the rabbits. It is also essential to keep the hutch clean and free of waste and debris. A dirty hutch can harbor bacteria and germs, making the rabbits more susceptible to illnesses that can affect their breathing and overall health. Ensure that the enclosure is adequately ventilated Place the hutch in a shaded area Use a wire mesh on the sides to improve airflow Use a fan to circulate air if necessary Provide shade cloth on the top of the enclosure Keep the hutch clean and free of waste and debris Following these tips can help you maintain the proper ventilation in your rabbit’s living space and ensure they stay cool and comfortable during the hot summer months. Hydration and Water Sources It is crucial to keep your rabbits hydrated in the heat of summer. Rabbits need
Expert Tips on How to Keep Rabbits Warm in Winter Outside
Naturepreservehub.com. Expert Tips on How to Keep Rabbits Warm in Winter Outside – Discover how to keep rabbits warm in winter outside with our expert tips. We offer practical advice for rabbit owners to ensure their pet’s comfort and safety. Winter can be a challenging season for those who keep rabbits as pets. The cold weather and harsh conditions can pose a risk to their health and well-being. However, with the right preparation and care, you can ensure that your rabbits stay comfortable and warm during even the coldest winter months. In this section, we will provide you with expert tips and advice on how to keep rabbits warm in winter outside. These tips will help you create a safe and cozy environment for your furry friends, ensuring that they remain healthy and happy throughout winter. Key Takeaways: Providing appropriate outdoor housing is the first step in keeping rabbits warm in winter. Sufficient bedding and nesting material can help rabbits stay warm and comfortable. Extra protection, such as rabbit jackets and windbreaks, can offer further warmth and safety. Adjusting their diet and hydration is crucial for their health in winter. By following these expert tips, you can ensure your rabbits’ well-being in even the coldest weather. How to Keep Rabbits Warm in Winter Outside Keeping rabbits warm in winter when they are kept outside is essential for their well-being. Here are some tips to help ensure your rabbits stay comfortable and safe during the colder months: Insulated Shelter Provide a well-insulated hutch or shelter for your rabbits. Make sure it is windproof and waterproof to protect them from the elements. Insulating materials such as straw can be added to the bedding for extra warmth. Dry Bedding Keep their bedding dry. Wet bedding can quickly lead to hypothermia. Check and change the bedding regularly, especially during rainy or snowy weather. Draft Protection Seal any gaps or cracks in the hutch to prevent drafts. Use materials like weather-stripping or blankets to cover any areas where cold air might seep in. Elevated Flooring Elevate the floor of the hutch to prevent it from becoming too cold. This can be done by placing the hutch on bricks or other raised surfaces to create a barrier between the rabbits and the cold ground. Proper Ventilation While you want to keep out drafts, ensure there is still proper ventilation in the hutch to prevent condensation and the buildup of ammonia from urine. Provide Extra Bedding During extremely cold weather, add extra bedding to the hutch. This provides additional insulation and helps the rabbits stay warm. Covered Runs If your rabbits have an outdoor run, consider covering it with a tarp or plastic sheeting to protect them from rain, snow, and wind. Ensure there is still good airflow to prevent moisture buildup. Feeding for Warmth Increase their food intake, especially during colder months. This helps them generate more body heat. Provide high-quality hay, which is not only a good source of nutrition but also generates heat during digestion. Heating Pads or Bottles Consider placing safe heating pads designed for animals or warm water bottles in their hutch. Ensure they can move away from the heat source if needed. Check Regularly Monitor your rabbits regularly, especially during very cold weather. If the temperatures drop severely, consider bringing them indoors if possible. Group Housing If you have more than one rabbit, they can huddle together for warmth. However, ensure there is enough space for each rabbit and that they get along well. Remember, different rabbit breeds have varying tolerance levels to cold weather, so it’s essential to observe your rabbits and adjust their living conditions accordingly. Always prioritize their safety and comfort, and consult with a veterinarian for personalized advice based on your specific situation. Choose the Right Outdoor Housing When it comes to keeping rabbits warm in winter outside, providing suitable outdoor housing is crucial. A well-insulated rabbit hutch or shelter that can protect them from wind and moisture is essential. Here are some features to look for in a rabbit hutch specifically designed for winter conditions: Size: The hutch should be large enough for the rabbit to move around comfortably, with room for a nesting area and litter box. Insulation: The hutch should have insulated walls, a solid roof, and a waterproof floor to keep it dry and toasty. Entrance: The entrance should be fitted with a flap or a door that can be closed at night to keep out drafts and predators. Elevated: The hutch should be raised a few inches off the ground to prevent moisture from seeping in. We recommend investing in a high-quality, durable rabbit hutch specifically designed for winter conditions. This will ensure that your rabbit stays warm and safe even during the coldest months. Provide Adequate Bedding and Nesting Material During winter, providing sufficient bedding and nesting material for your rabbits is crucial to ensure their warmth and comfort. Choosing appropriate rabbit bedding for winter is essential. Always opt for bedding that is comfortable and does not retain moisture. Avoid cedar and pine shavings as they contain phenols that can damage your pet rabbit’s liver when inhaled. Instead, use straw, hay, or aspen shavings as these are safer options for your rabbit’s health. Bedding should be deep enough to create a cozy environment, but not so deep that your rabbit cannot move about freely or the temperature is too high. An ideal bedding depth is three inches. Nesting material for rabbits is also important in winter. A rabbit’s natural instinct is to burrow, and you can help satisfy this need by providing nesting material like blankets, towels, or even shredded paper. However, make sure the materials are clean and free of any toxins that may harm your pet rabbit’s health. Offer Extra Protection from the Cold When it comes to keeping rabbits warm in winter, it’s essential to offer them extra protection from the elements. Here are some tips to ensure your rabbits stay cozy during the cold months: Create
Effective Tips on How to Keep a Hamster Cage from Smelling
naturepreservehub.com. Effective Tips on How to Keep a Hamster Cage from Smelling – Learn how to keep a hamster cage from smelling with our easy and effective methods, ensuring a fresh and healthy environment for your pet. Hamsters are adorable pets that bring joy and companionship to our lives. However, the unpleasant odor emitted from their cage can be a major turn off. A dirty hamster cage not only smells bad but can also lead to health problems for your pet. In this section, we will provide easy and effective tips on how to keep a hamster cage from smelling. Follow these tips to maintain a fresh and healthy environment for your beloved pet. Key Takeaways: Regular cleaning of the cage is crucial to prevent odors from building up Use odor-absorbing bedding or wood shavings to keep the cage smelling fresh Proper ventilation is essential in reducing the smell from the hamster cage Choose a well-ventilated area to place the cage A clean and fresh cage will contribute to the overall well-being and happiness of your hamster How to Keep a Hamster Cage from Smelling Keeping a hamster cage clean is essential to prevent unpleasant odors. Here are some tips to help you maintain a fresh-smelling hamster cage: Regular Cleaning Schedule Establish a routine for cleaning your hamster’s cage. Perform a thorough cleaning at least once a week. Spot clean daily by removing soiled bedding and uneaten food. Bedding Choice Use high-quality, absorbent bedding materials, such as aspen shavings, paper-based bedding, or hemp bedding. Avoid cedar or pine bedding, as the natural oils in these woods can be harmful to hamsters and contribute to odors. Proper Ventilation Ensure the cage has proper ventilation to allow air circulation. Stagnant air can contribute to odors. Avoid placing the cage in a humid or poorly ventilated room. Use a Litter Box Train your hamster to use a designated corner of the cage as a bathroom area. Place a small litter box with hamster-safe bedding or litter in this corner. Remove Wet or Soiled Bedding Check the cage daily for wet or soiled bedding, and promptly remove and replace it. Pay special attention to areas where your hamster tends to urinate. Clean Accessories Wash and sanitize toys, hideouts, and other cage accessories regularly. Use hamster-safe cleaning products or a mixture of water and vinegar for cleaning. Proper Food Handling Remove any uneaten fresh food promptly to prevent it from spoiling and causing odors. Use a food dish to minimize food spillage. Hygienic Water Source Provide fresh water daily in a clean water bottle. Regularly clean the water bottle to prevent algae growth and bacterial buildup. Air Fresheners Consider placing a small, hamster-safe air freshener near the cage. Avoid using strong or scented products, as hamsters are sensitive to odors. Wash Cage Components Periodically disassemble the cage and clean all components, including bars, platforms, and ramps. Use a mild, hamster-safe disinfectant or a vinegar solution for cleaning. Monitor Health A healthy hamster is less likely to produce strong odors. Regularly monitor your hamster’s health and address any issues promptly. Remember that each hamster is unique, and you may need to adjust these recommendations based on your hamster’s habits and preferences. Regular maintenance and a clean environment will go a long way in keeping your hamster and its cage smelling fresh. Choose the Right Bedding Material As we discussed earlier, selecting the right bedding material is critical in reducing the odor coming from your hamster cage. We recommend opting for bedding that is designed to absorb odors, such as odor-absorbing bedding or wood shavings for hamsters. These materials can help keep the cage smelling fresh for longer. Bedding Material Pros Cons Odor-absorbing bedding Reduces odor Expensive Wood shavings Safe for hamsters to bury in Less effective in odor control compared to other bedding materials As you can see in the table above, odor-absorbing bedding may be more effective in reducing odor, but it can also be more expensive. Wood shavings are a more affordable option and are safe for hamsters to dig and play in, but they may not be as effective in absorbing odor as odor-absorbing bedding. Ultimately, the decision depends on your personal preferences and budget. Keep Reading : Can a Hamster Eat a Strawberry? Regular Cleaning Schedule Keeping your hamster cage clean and fresh is essential for the health and well-being of your pet. Establishing a regular cleaning schedule is an effective way to maintain a hygienic living environment and prevent unpleasant odors from building up. We recommend the following tips for a proper hamster cage cleaning routine: Frequency:Â Aim to clean your hamster cage once a week, depending on the size of the cage and the number of hamsters you have. If your pet produces a lot of waste or you notice a strong smell, you may need to clean the cage more often. Remove Soiled Bedding:Â The first step in cleaning your hamster cage is to remove any soiled bedding or litter. This can be done using a small scoop or with gloved hands. Be sure to discard the waste in a sealed bag and dispose of it properly. Wipe Down Surfaces:Â Once you have removed the soiled bedding, use a damp cloth or paper towel to wipe down the surfaces of the cage. A mild soap or cleaning solution can also be used to disinfect the cage. Replace Bedding:Â After cleaning and disinfecting the cage, replace the old bedding with fresh, clean material. Choose a high-quality bedding material that is absorbent and helps control odors. Cage Maintenance:Â In addition to regular cleaning, it’s important to perform routine cage maintenance. This includes trimming your hamster’s nails, checking the water bottle or dish for cleanliness and functionality, and inspecting the cage for any signs of damage or wear. By following these tips for a proper hamster cage cleaning schedule and maintenance routine, you can keep your pet’s living space clean and hygienic, eliminating any unpleasant odors and promoting their overall health and happiness. Keep Reading :
Learn How to Keep Your Hamster Warm with Our Easy Tips
naturepreservehub.com. Learn How to Keep Your Hamster Warm with Our Easy Tips – Discover how to keep your hamster warm with our expert advice. Safe, simple, and effective tips for your pet’s comfort, even during the coolest seasons. As pet owners, it’s our responsibility to ensure our furry friends are comfortable, especially when the weather gets chilly. If you’re a hamster owner, you may be wondering how to keep your hamster warm during the colder months. Fortunately, there are simple steps you can take to provide your pet with a cozy and warm living space. How to Keep Your Hamster Warm Key Takeaways Keeping your hamster warm is important for their well-being Creating a warm living space and providing adequate bedding can help insulate your pet’s habitat Regulating temperature and utilizing heat sources can also help keep your hamster warm Monitoring your hamster’s behavior and health is crucial for ensuring they stay warm and healthy By following our expert advice, you can ensure your hamster stays warm and comfortable throughout the year Setting Up a Warm Living Space Creating a warm living space for your hamster is essential for their comfort and well-being. A well-insulated cage can help regulate the temperature and keep your furry friend warm and cozy. When choosing a cage, consider the material and size. Glass aquariums or plastic cages with solid walls are ideal, as they provide good insulation. A wire-mesh cage, on the other hand, can be drafty and cold. Be sure to place the cage in a warm and dry location, away from direct sunlight and drafts. A quiet area of the house, such as a bedroom or living room, is a good choice. You can further insulate the cage by adding blankets or towels around the sides and top. Just make sure your hamster has enough ventilation and fresh air. Tip: Provide your hamster with a hideaway or nest box lined with soft bedding, such as shredded paper or tissue. This will give them a warm and cozy place to sleep. Overall, the key to creating a warm living space for your hamster is to be mindful of their environment. With proper insulation and placement, you can help keep your pet comfortable and content. Providing Adequate Bedding Choosing the right bedding for your hamster is essential to keep them warm and comfortable. The ideal bedding should be soft, warm, absorbent, and safe for your pet. The best materials for hamster bedding are: Aspen shavings: This is a popular choice as it is soft, absorbent, and does not contain any irritating oils or chemicals. Paper-based bedding: This is another safe option for hamsters, and it’s usually made from recycled paper, making it eco-friendly. Hay: This is an excellent option for burrowing hamsters as it allows them to create cozy nests, and it’s also warm and soft. It’s essential to use enough bedding to create a thick layer in your hamster’s habitat. The recommended depth of bedding is around 6 inches to ensure your pet stays warm and can burrow comfortably. Layering Bedding for Warmth To create a warm and cozy environment for your hamster, you can layer different types of bedding. Layer Material Base layer Aspen shavings Second layer Paper-based bedding Top layer Hay The base layer of aspen shavings provides a soft and absorbent foundation, while the paper-based bedding adds extra warmth and insulation. Finally, the top layer of hay creates a cozy and comfortable nest for your hamster to snuggle in. It’s important to monitor your hamster’s bedding regularly and clean it out every week to prevent bacteria buildup. A clean and hygienic environment is crucial for your pet’s health and well-being. “Using the right bedding and layering it correctly can make a significant difference in keeping your hamster warm and comfortable.” Regulating Temperature in the Hamster Cage One of the most important factors in keeping your hamster warm and healthy is regulating the temperature in their cage. Hamsters are sensitive creatures that require a consistent and comfortable environment to thrive. Temperature fluctuations can cause stress, illness, and even death in extreme cases. So, what is the ideal temperature for a hamster’s cage? For most hamsters, the temperature should be between 65-75°F (18-24°C). However, it’s important to research your particular breed of hamster, as some may require slightly higher or lower temperatures. The best way to regulate temperature in your hamster’s cage is by using a thermometer. Place the thermometer in a central location within the cage, away from any heat sources, to get an accurate reading. If the temperature falls below the recommended range, there are several methods to raise it safely. Heating Options One option is to use a ceramic heat emitter. These devices emit heat without light and are safe for use in hamster cages. They can be attached to the ceiling of the cage with a clamp lamp or placed underneath the cage on a heat-resistant surface. Another option is to use a heating pad designed for small animals. These pads can be placed under a portion of the cage to create a warm spot for your hamster to snuggle up in. However, it’s important to monitor the temperature closely and ensure the pad doesn’t overheat. Avoiding Overheating While it’s important to keep your hamster warm, it’s equally important to avoid overheating. Temperatures above 85°F (29°C) can be dangerous for your hamster, causing heat stress and dehydration. To prevent overheating, avoid placing the cage in direct sunlight or near heat sources such as radiators or air vents. Additionally, ensure the bedding is not too thick, as this can trap heat and cause the cage to become too warm. Monitoring Temperature Regular monitoring of the temperature in your hamster’s cage is crucial for their well-being. Check the thermometer frequently to ensure the temperature remains within the recommended range. If you notice any changes in your hamster’s behavior, such as excessive sleeping or lethargy, it may be a sign that the temperature is too low. By following these tips, you can ensure
Effective Tips on How to Keep Cats from Scratching Furniture
Naturepreservehub.com. Effective Tips on How to Keep Cats from Scratching Furniture – Discover how to keep cats from scratching furniture with our effective tips. Save your favorite furniture pieces from those stubborn claws today! As cat owners, we love our feline friends, but we don’t always love the damage they can cause to our furniture with their scratching. Luckily, there are effective tips and techniques to prevent cats from scratching our beloved furniture. In this section, we will explore practical solutions to help save our furniture from those stubborn claws once and for all. Key Takeaways: Understanding why cats scratch furniture can help us find better alternatives for them to scratch. Providing suitable scratching surfaces, such as scratching posts, pads, and boards, is an effective way to deter cats from scratching furniture. Using deterrents and training techniques, such as repellents and positive reinforcement, can help discourage cats from scratching furniture. Patience and consistency are key to preventing cats from scratching furniture and creating a harmonious environment for both cat and furniture. Understanding Why Cats Scratch Furniture As cat lovers, we all know that cats love to scratch. But what is it about our furniture that makes it so irresistible to them? Understanding the reason behind this behavior is the first step in finding a solution. Instinctual Behavior Firstly, it’s important to note that scratching is a natural and instinctual behavior for cats. Scratching helps them relieve stress, mark their territory, and maintain their claws. In the wild, cats scratch trees and other rough surfaces to keep their claws sharp and healthy. Texture and Scent When it comes to furniture, cats are drawn to certain textures and scents. They prefer rough, textured surfaces that allow them to really sink their claws into. Additionally, cats have scent glands in their paws, so when they scratch, they’re also marking the furniture with their scent. Boredom and Anxiety Cats may also scratch furniture out of boredom, anxiety, or frustration. If they’re not getting enough mental or physical stimulation, they may resort to destructive behaviors like scratching. Similarly, if they’re feeling stressed or anxious, they may turn to scratching as a release. Providing Suitable Scratching Surfaces As we learned earlier, cats have a natural instinct to scratch. Providing them with suitable scratching surfaces is crucial in preventing them from scratching your furniture. Here are some tips on how to choose the right scratching surface: Type of Scratching Surface Pros Cons Scratching Posts Tall, sturdy posts provide vertical scratching option Can be covered in various materials like sisal, carpet, or cardboard May take up space in the room May not fit your home decor style Scratching Pads Small, portable surface Can be made of various materials like cardboard, sisal, or carpet Can be placed near furniture to redirect cat’s attention May not provide vertical scratching option May not be as durable as posts Scratching Boards Flat surface that can be hung or placed on the floor Can be covered in various materials like sisal or corrugated cardboard May not provide vertical scratching option May not be as durable as posts Once you have chosen the right scratching surface, it’s important to encourage your cat to use it. Here are some tips: Place the scratching surface near your cat’s favorite furniture. Rub catnip on the scratching surface to attract your cat. Praise your cat when they use the scratching surface. Redirect your cat’s attention to the scratching surface when you catch them scratching furniture. Consider having multiple scratching surfaces available in different rooms. By providing suitable scratching surfaces and encouraging your cat to use them, you can save your furniture from their sharp claws. Using Deterrents and Training Techniques Providing suitable scratching surfaces is often effective, but some cats may still target your furniture. If this is the case, it’s time to use deterrents and training techniques. Using Repellents Repellents work by creating an unpleasant sensation or smell that cats dislike, making them less likely to scratch. There are various commercial cat repellent sprays available, or you can create your own natural deterrents using citrus fruits or essential oils. However, it’s crucial to ensure that the repellent is safe for your cat and won’t damage your furniture. Test a small area first and observe your cat’s reaction. Positive Reinforcement Positive reinforcement involves rewarding your cat for desirable behaviors, such as using a scratching post. Whenever you see your cat using the scratching post, offer praise, petting, or treats. This method reinforces the idea that scratching the post is a desirable behavior and encourages your cat to continue doing it. Redirecting Behavior If your cat continues to scratch furniture, try redirecting their behavior to a more suitable surface. Use toys, treats, or catnip to encourage them to approach the scratching post. Place the post near the furniture they tend to scratch, and gradually move it to a more suitable location. Reinforce positive behavior with treats or praise. Deterrents and Training Techniques Pros Cons Repellents Can be effective in preventing scratching May not work for all cats; some commercial repellents may have harmful chemicals Positive Reinforcement Reinforces desirable behavior and strengthens bond with your cat May take time and patience to see results; may not work for all cats Redirecting Behavior Encourages your cat to use a suitable scratching surface May take time and patience to see results; may not work for all cats There are various methods you can use to prevent your cat from scratching furniture. It’s essential to find a solution that works for your cat’s individual personality and behavior. With patience and consistency, you can successfully train your cat to use suitable scratching surfaces and save your furniture from damage. Conclusion Keeping cats from scratching furniture can be a cause of frustration for many cat owners. However, by implementing the tips and techniques we have discussed, you can successfully prevent your cats from scratching your beloved furniture. It’s important to understand that scratching is a natural behavior for cats and providing them with suitable
How to Keep Birds from Eating Grass Seed
Naturepreservehub.com. How to Keep Birds from Eating Grass Seed – Discover expert tips on how to keep birds from eating grass seed and maintain a lush, green lawn. Equip yourself with effective strategies today. Are you tired of birds eating your newly planted grass seed? It’s a common problem that can be frustrating for homeowners. Fortunately, there are several solutions available to prevent birds from feasting on your lawn. In this section, we will discuss effective strategies to keep birds away from your grass seed, including bird deterrents and proper lawn care. Key Takeaways: Preventing birds from eating grass seed requires a combination of strategies. Bird deterrents such as physical barriers, sound and visual repellents can be effective. Selecting bird-resistant grass seed varieties and timing planting can also help minimize bird activity. Maintaining a healthy lawn is key to making it less attractive to birds. If all else fails, commercial bird deterrent products can provide additional protection. Understanding Why Birds Eat Grass Seed Have you ever wondered why birds are so attracted to your grass seed? It turns out that bird feeding habits have a lot to do with it. Birds have a natural instinct to forage for food, and grass seed presents an easy and convenient source of nutrition for them. Moreover, bird behavior towards grass seed is rooted in their biology. Birds have a gizzard, a special organ that helps them digest food. To grind tough food items like seeds, birds swallow small stones, which then help to break down the food in the gizzard. Because grass seed is small and easy to swallow, birds tend to seek it out as a reliable source of nourishment. Additionally, the time of year influences how often birds feed on grass seed. During the spring and summer, many bird species are nesting and raising their young, which requires them to consume more protein-rich diets. Grass seed provides an excellent source of protein, making it an even more appealing food source for birds during these seasons. Choosing the Right Grass Seed Varieties Choosing the right type of grass seed can play a significant role in preventing birds from feeding on your lawn. Several bird-resistant grass seed varieties are available in the market, which are less palatable to birds. Such seeds have a bitter taste that repels birds and keeps them from feeding on your lawn. When selecting grass seed, ensure that it is labeled as bird-resistant or bird-proof. You can find such seeds in most seed catalogs or garden stores. It is also recommended to select grass seed that is better adapted to your region and climate, as it will be more resilient to pests and bird feeding. If you are unsure which type of grass seed to choose, consult a local gardening expert or contact your county’s agriculture extension office. They can provide you with valuable guidance on the best grass seed varieties for your area. Timing the Grass Seed Planting Timing the planting of your grass seed is an essential aspect of preventing birds from eating it. The timing of grass seed planting can significantly impact bird feeding activity. One crucial factor to consider is bird migration patterns. Birds migrate in search of food and shelter, and their activity levels vary based on the season. Spring and fall are the peak seasons for bird migration, so avoid planting your grass seed during these times. Planting your grass seed during the winter months, when bird activity is at its lowest, can be an effective strategy to prevent birds from feeding on it. Additionally, planting your grass seed in the early morning or late evening, when birds are less active, can also deter them from feeding on it. Another way to time your grass seed planting is to observe bird behavior in your area. If you notice that birds are frequently feeding on grass seed during a particular time of day or season, avoid planting it during those periods. Using Physical Barriers Physical barriers can be an effective solution to keep birds away from your grass seed. The following are some popular methods: Bird netting for grass seed Bird netting is a fine mesh material that can be draped over your lawn to prevent birds from accessing your grass seed. A bird netting system is easy to install and remove, making it convenient for lawn care. It’s also a cost-effective solution. Scare tactics for birds Scare tactics can be effective in deterring birds. For example, hanging reflective objects, such as CDs or old DVDs, or aluminum foil strips can disorient and scare birds away. Additionally, you can set up realistic decoys of predators, such as owls or hawks, to intimidate birds. Physical barriers to deter birds Fences, barriers, and other structures can be used to create physical obstacles that birds cannot overcome. For example, placing chicken wire over the seed or covering it with burlap can discourage birds from landing and feeding on your lawn. Bird repellent methods There are several bird repellent methods available, ranging from sprays to gels and even taste deterrents. Some bird repellents contain natural substances that birds find unappealing, like peppermint oil, while others contain chemicals that irritate birds’ senses. However, be aware that some bird repellent methods may require repeated application and can harm birds if not used properly. Implementing Sound Deterrents If you’re looking for a non-invasive method to keep birds away from your grass seed, sound deterrents can be a practical solution. These devices emit sounds that are unappealing to birds, making them fly away from your lawn. Ultrasonic devices: Ultrasonic devices are popular bird deterrents that emit high-frequency sound waves. These sounds are above the human hearing range but are audible to birds, making them feel uncomfortable and disorientated. These devices are effective in deterring a wide range of bird species. However, they have limited coverage, are sensitive to surroundings, and may not work in all situations. Audio bird repellents: Audio bird repellents produce distress calls and predator sounds that signal danger to birds. These sounds replicate the cries of birds in distress or the calls of bird
What Temp is Too Hot for Dogs Outside?
naturepreservehub.com. What Temp is Too Hot for Dogs Outside? – Learn with us about “what temp is too hot for dogs” when they’re outside. Protect your pets from overheating and ensure their safety and comfort today! As dog owners, we want our pets to enjoy the great outdoors. However, it’s essential to understand that dogs are more susceptible to heat-related illnesses compared to humans. In this section, we will explore the temperature thresholds that could be harmful to dogs when they are outside. Understanding these limits is critical for ensuring the well-being and safety of your furry companions. What Temp is Too Hot for Dogs Outside? Key Takeaways: Dogs are more sensitive to heat than humans Understanding the ideal temperature range for dogs is crucial Dogs cannot communicate their discomfort verbally Signs of overheating should be recognized immediately Preventive measures can protect dogs from heat-related illnesses Understanding a Dog’s Heat Sensitivity As dog owners, we must understand that our furry companions are more sensitive to heat than humans and can suffer from heat stress and heat stroke, especially during hot summer months. Dogs have a limited ability to regulate their body temperature and rely mainly on panting to cool down. This makes them particularly vulnerable to heat-related illnesses and dehydration. We can compare a dog’s heat sensitivity to cooking a steak: When cooking a steak, we have a temperature range that we need to stay within to ensure that it’s cooked correctly. Too high of heat can dry it out or burn it, while too low of heat will leave it undercooked. Similarly, dogs have a temperature range that they thrive in. The Science Behind Dogs’ Heat Sensitivity Dogs primarily release heat through their respiratory tract by panting and through their paw pads by sweating. Unlike humans, dogs do not have sweat glands all over their bodies. This is why it’s essential to keep their paw pads hydrated to help regulate their body temperature. However, when the surrounding temperature is too high or humidity is too low, evaporative cooling can become ineffective. When a dog’s body temperature exceeds a certain threshold, usually around 103°F, their body’s natural cooling mechanisms become less effective, and heat stress can occur. If their temperature surpasses 106°F, they can develop heat stroke, a life-threatening condition that requires immediate veterinary attention. Identifying Signs of Heat-Related Distress in Dogs It’s essential to recognize the signs of overheating and distress in your dog. Early intervention can prevent more severe conditions from developing. Here are some signs of heat-related stress to watch out for: Heavy panting and rapid breathing Excessive drooling and salivating Gums and tongue turning bright red Sleepiness or lack of energy Vomiting and diarrhea Difficulty standing or walking and Collapsing If your dog exhibits any of these symptoms, move them to a cool, shaded area immediately. Offering small amounts of cool water and using a fan can help to lower their body temperature. However, if they are showing signs of heat stroke, it is crucial to seek veterinary attention right away. Ideal Temperature Range for Dogs As pet owners, it’s crucial to understand the ideal temperature range for dogs to ensure their comfort and well-being. Dogs are highly sensitive to heat, and when they are exposed to extreme temperatures, it can result in heat-related illnesses that can be life-threatening. The ideal temperature range for dogs can depend on several factors such as breed, age, and overall health. Generally, dogs feel most comfortable in temperatures ranging from 60°F to 75°F. Anything above 75°F can be uncomfortable for some dogs and potentially harmful for others. Breeds with short snouts such as bulldogs and pugs, as well as dogs with thick fur coats, may have a lower threshold for heat and can feel uncomfortable in temperatures as low as 70°F. It’s crucial to monitor your dog’s behavior and watch for signs of distress when they are exposed to warmer temperatures. If the weather is hot and humid, it’s recommended to keep your dog indoors in a cool, air-conditioned environment. Factors Affecting a Dog’s Tolerance to Heat Several factors can affect a dog’s tolerance to heat beyond breed and coat type. These include: Age: Puppies, senior dogs, and dogs with health conditions may have a lower tolerance for heat due to their age or underlying health issues. Weight: Overweight dogs may have a more challenging time regulating their body temperature and may overheat more easily than their lean counterparts. Activity Level: Dogs that are very active or have a high energy level may overheat more quickly than those that are less active. Keeping Your Dog Comfortable in Warm Weather There are several ways to keep your dog comfortable and safe during warm weather, including: Providing plenty of fresh, cool water to prevent dehydration Creating a shaded area outside for your dog to relax in Avoiding outdoor activities during the hottest parts of the day Never leaving your dog alone in a parked car, even if it’s just for a few minutes By understanding the ideal temperature range for dogs and taking the necessary precautions, we can ensure our furry companions stay happy and healthy no matter the weather. Warning Signs of Overheating in Dogs As we mentioned in the previous section, dogs are more vulnerable to overheating than humans. They cannot sweat like we do and rely on panting to regulate their body temperature. When they are exposed to high temperatures and humidity, their cooling system can fail, leading to heat exhaustion or heatstroke, which can be life-threatening. It’s crucial to recognize the warning signs of overheating in dogs so that you can take immediate action to cool them down and prevent further complications. Here are some common symptoms to look out for: Excessive panting: When dogs are overheating, they will pant more rapidly and excessively than usual. This is their primary cooling mechanism, but if it doesn’t work, it can lead to respiratory distress. Dehydration: Overheated dogs may experience dry, tacky gums, and sunken eyes. Their skin may also lose elasticity, meaning that it takes longer for the skin to fall back into